➔ Overview
Inspiration
I was inspired recently by a tweet from Claire Carroll:
gonna set up a whole data stack just to:
— Claire Carroll (@clairebcarroll) August 6, 2021
- extract data from twitter
- load it into a warehouse
- set up a dbt model that detects when the people I follow stop tweeting at their normal frequency
- uses a "reverse ETL" tool to send a twitter DM that says "u ok?"
I've been looking for an excuse to dig into some technologies that are new to me, and decided to use this as an opportunity for a weekend project.
➔ Project Architecture
So on the advice of my friend (and brilliant former Googler) Danny Hermes, I moved off the container structure and went straight to Google Cloud Functions (the Google equivalent of AWS Lambda). This provided the added bonus of building this project as a serverless app, with data polling triggered by scheduled GCP Pub/Sub messages.
The overall project became:
- This is functional code and works for this little project, but it is hardly production-grade. I have a smattering of error checks and tests (mostly to handle errors I encountered while building), but it’s well short of what I’d want for a commercial application. I’m still a little surprised I actually gave this app access to post to my Twitter...
- The naming conventions are a bit of a mess. I use ‘status’ and ‘tweet’ interchangeably, and I treat ‘actions’ and ‘activity’ differently. Sorry. Built this project in stages as an experiment over a few evenings, so project clarity was not priority #1.
- I chose Google Cloud because I wanted to learn more about it and it has a good free tier. If I were building this for a production use case, I would almost certainly choose Snowflake and AWS. Given the app’s simplicity, I’d probably deploy as much of this self-contained on Snowflake as possible. See a great example from Census on pulling data from the Clearbit API using a Snowflake external function and an AWS Lambda.
- Feedback welcome! Feel free to DM or email me.
Key Steps
- Apply for a Twitter Developer Account
- Set up your code environment
- Set up your Twitter Developer Account
- Set up your Google Cloud Platform environment
- Deploy and configure Google Cloud Functions and Pub/Subs
- Clone dbt GitHub repo and set up dbt Cloud
- Create and configure dbt project
Assets
- GitHub repo for the Python code (running on Cloud Functions)
- GitHub repo for the dbt code (running on BigQuery via dbt Cloud)
➔ Process
1. Apply for a Twitter Developer Account
The long pole in the tent in working with Twitter data is waiting for approval for the Twitter API. This took 48–72 hours.
Fill out your details at the Twitter Developer Portal.
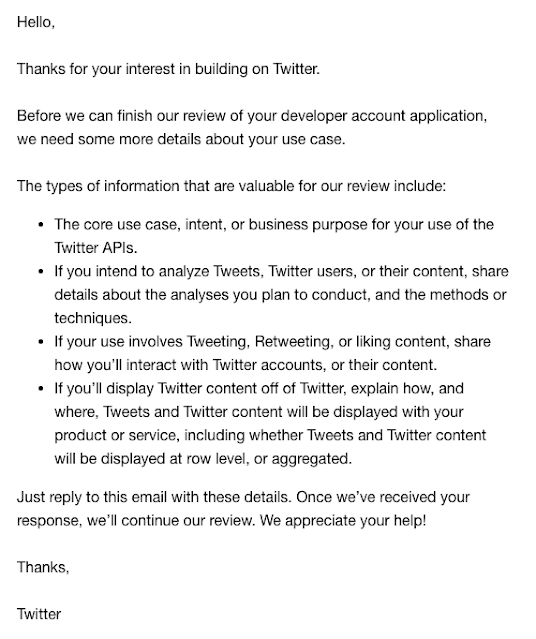
I wrote some basic details about a personal project using Twitter data to learn about the API. I got a followup email asking for basically all my information again:
2. Set up your code environment
git clone https://github.com/zacharykimball/twitter-data-stack
cd twitter-data-stack
python3 -m pip install tweepypython3 -m pip install google-cloud-bigquerypython3 -m pip install functions-framework
pip-compile --generate-hashes --allow-unsafe --output-file=requirements.txt requirements.in
cp config.py.example config.py
3. Set up Your Twitter Developer Account
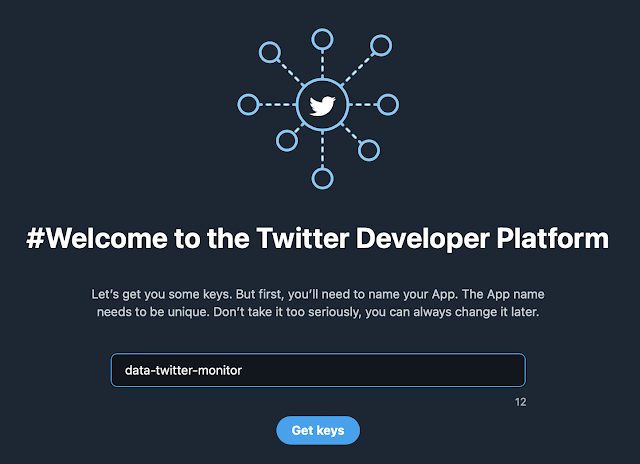
Create the name of your app:
Edit the ‘config’ file (see prior section) to add your Twitter consumer key and consumer secret.
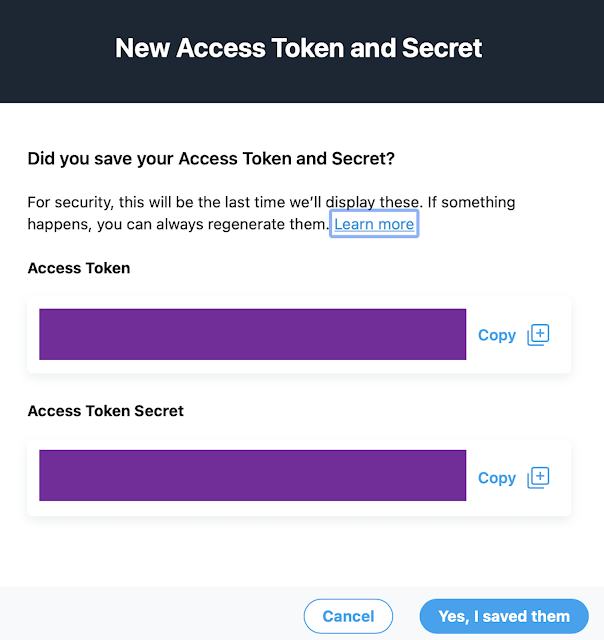
Then go to your project and select Keys and tokens:
4. Set up your Google Cloud Platform environment
Name the project and click “Create”:
Choose “Select Project”:
Go back to the GCP dashboard and find the project number associated with your project (censored in purple here):
Edit your ‘config’ file to add the project number.
Configure a service account.
Choose “Credentials”:
Click “Create Credentials” and choose “Service account”:
Give the service account a name and click “Create and Continue”:
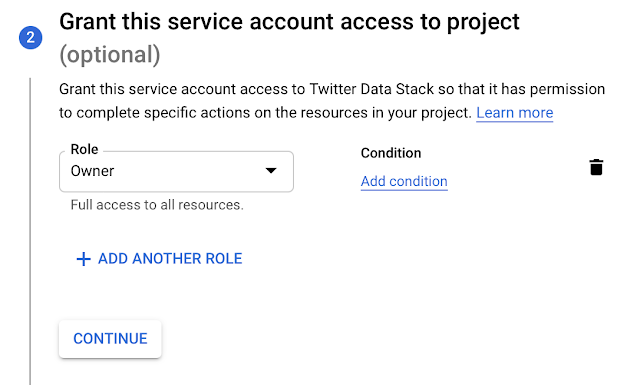
Now you have to select the permissions to give the service account.
Note: Google had about 1,000 role types so I gave up on picking something with appropriately restricted permissions and instead chose “Owner” to give broad leeway so I wouldn’t run into permissions issues later. DON'T DO THIS ON A PRODUCTION APPLICATION.
Click “Continue”.
Grant your own user access to this service account, which will be important later. Click “Done”.
On the service accounts page, find the service account:
Edit the ‘config’ file in your repo and add the service account email address from GCP.
Set up keys.
Choose “Manage keys”:
Create new key:
Create a JSON key:
The private key file should download automatically:
You will have a file like ‘twitter-data-stack-123456.json’ available. Move it to your project directory and change the name to ‘key.json’. (If you store or name the file differently, be sure to update your config file to reflect the correct file path.)
Create datasets.
Go to GCP and navigate to BigQuery:
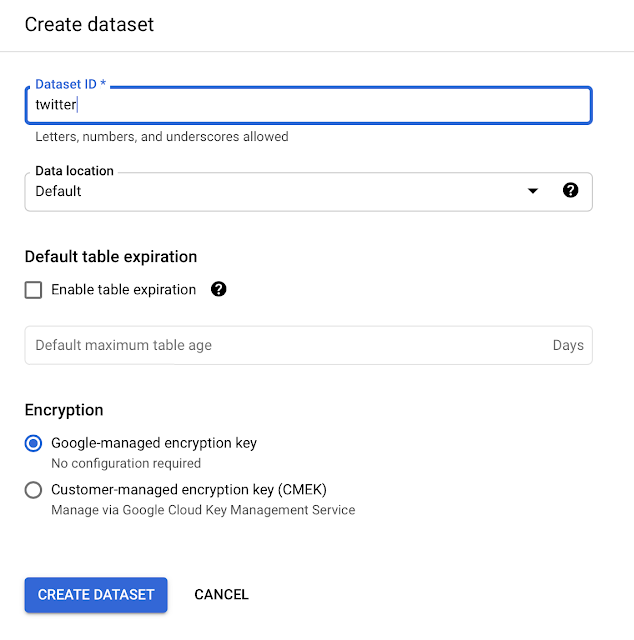
Choose ‘create dataset’ in your current project to create a new dataset:
Give your dataset a name (such as ‘twitter’). This will be the database where we land raw data for later analysis with dbt:
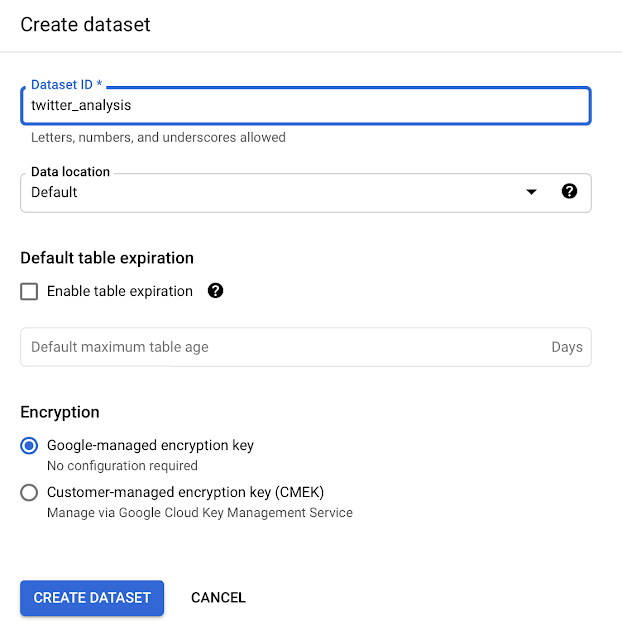
While we’re here, we’re going to create another dataset to use for our analyzed data later on. Give your dataset a name (such as ‘twitter_analysis’):
Enable the BigQuery API.
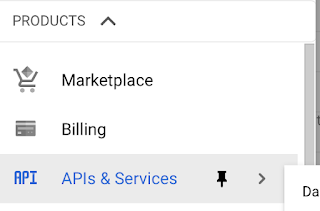
Go to APIs & Services:
Choose the BigQuery API:
Ensure that the API is enabled:
Set up billing (to make everything work, not to actually pay anything).
We need to set up a billing account or GCP will start denying us access to services. Go to GCP Billing:
Choose Link a Billing Account:
If you have an existing billing account, you can link it here. If not (I did not as this is my first foray into GCP) you can Create Billing Account here.
Complete the verification flow to set up billing and link your billing account.
Set up budget.
We are building a tiny project, have the benefit of limited free services, and also have a credit for a 90-day free trial. But things could somehow get away from us with an errant query or process—and this is supposed to be a free side project! Let’s get ahead of the curve by setting up a budget and alerts:
Create a budget:
GCP budgets are defined by a "scope." I set up two scopes — one for understanding rough implied spend (not including discounts and promotions) and one to have “hard” limits that I don’t want to cross (inclusive of discounts and promotions).
First, I’m monitoring all services (exclusive of discounts/promotions):
I want alerts if I’m going over $30 per month ($1 per day). This is a tiny pet project, I have no idea how GCP’s billing stacks up, and I want to understand immediately what my “burn rate” would be if I have to pay (and thus if I need to nuke the project).
I threw in a bunch of thresholds to make sure I’d get tagged along the way, if needed.
Click “Finish” to activate the monitoring.
I then created a second budget to try to institute more of a “hard limit.” (Note that GCP doesn’t actually let you set a limit here, only alerts if you are approaching a predefined “budget.” Hence why I’m going overkill on alerting to understand the cost factors in my first GCP project.)
This one is inclusive of discounts and promotions:
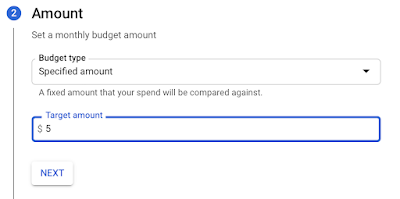
I decided if push comes to shove, I was okay forking over $5/month for this little game:
Here I’m using forecasted triggers to understand where actual spend might land:
Click “Finish” to activate the second budget monitor.
Set up alerting.
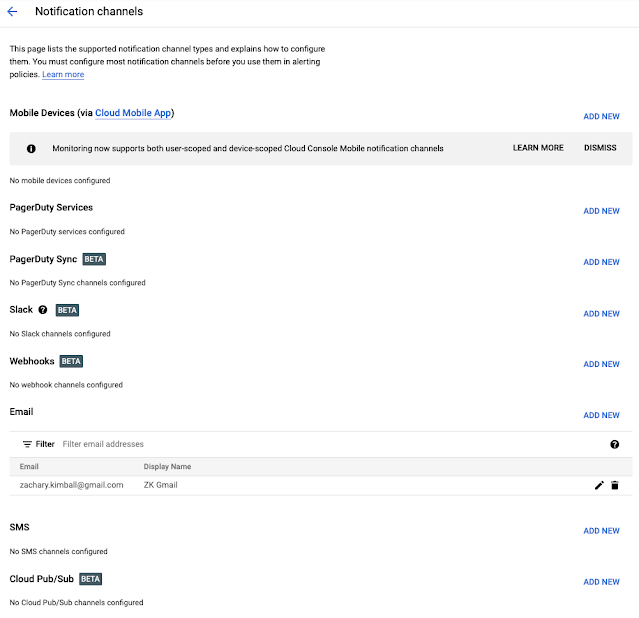
Finally, we turn on alerting. Set up a notification channel for this project, using your preferred notification method (I used email).
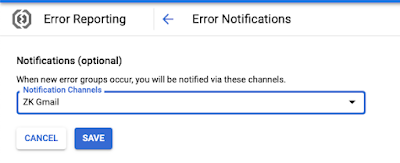
Then in error notifications, select your new notification channels:
5. Deploy and configure Google Cloud Functions and Pub/Subs
brew install --cask google-cloud-sdk
source "$(brew --prefix)/Caskroom/google-cloud-sdk/latest/google-cloud-sdk/path.zsh.inc"
source "$(brew --prefix)/Caskroom/google-cloud-sdk/latest/google-cloud-sdk/completion.zsh.inc"
gcloud components update
gcloud auth activate-service-account <service-account-email>@twitter-data-stack.iam.gserviceaccount.com --key-file=key.json
Deploy function to pull tweets.Note: the code that actually triggers a tweet is not active to prevent people from accidentally tweeting by following this guide blindly. If you want to trigger real tweets, you need to take two steps in main.py:- (1) uncomment line 247
- (2) delete or comment out line 250
You can check that your code works locally by running the following in one Terminal window:
- (1) uncomment line 247
- (2) delete or comment out line 250
functions_framework --signature-type event --target pull_tweets
curl localhost:8080 \
-X POST \
-H "Content-Type: application/json" \
-d '{
"context": {
"eventId":"1144231683168617",
"timestamp":"2020-05-06T07:33:34.556Z",
"eventType":"google.pubsub.topic.publish",
"resource":{
"service":"pubsub.googleapis.com",
"name":"projects/sample-project/topics/gcf-test",
"type":"type.googleapis.com/google.pubsub.v1.PubsubMessage"
}
},
"data": {
"@type": "type.googleapis.com/google.pubsub.v1.PubsubMessage",
"attributes": {
"attr1":"attr1-value"
},
"data": "d29ybGQ="
}
}'
gcloud functions deploy pull_tweets --runtime python39 --trigger-topic pull_tweets --timeout 2m
gcloud pubsub topics publish pull_tweets --message 'test run'
gcloud functions logs read pull_tweets --limit 10
gcloud scheduler jobs create pubsub pull_tweets_job --schedule "0 * * * *" --topic pull_tweets --message-body "hourly run"
functions_framework --signature-type event --target action_tweets
curl localhost:8080 \
-X POST \
-H "Content-Type: application/json" \
-d '{
"context": {
"eventId":"1144231683168617",
"timestamp":"2020-05-06T07:33:34.556Z",
"eventType":"google.pubsub.topic.publish",
"resource":{
"service":"pubsub.googleapis.com",
"name":"projects/sample-project/topics/gcf-test",
"type":"type.googleapis.com/google.pubsub.v1.PubsubMessage"
}
},
"data": {
"@type": "type.googleapis.com/google.pubsub.v1.PubsubMessage",
"attributes": {
"attr1":"attr1-value"
},
"data": "d29ybGQ="
}
}'
gcloud functions deploy action_tweets --runtime python39 --trigger-topic action_tweets
gcloud pubsub topics publish action_tweets --message 'test run'
gcloud functions logs read action_tweets --limit 10
gcloud scheduler jobs create pubsub action_tweets_job --schedule "5 15 * * *" --topic action_tweets --message-body "daily action run"
6. Clone dbt GitHub repo and set up dbt Cloud
Having direct access to GitHub is very advantageous with dbt Cloud, because you can enable features like CI.
Clone or fork the twitter-data-stack-dbt repo on GitHub.
If you want to configure your own rules to trigger tweets, they are in models/marts/actions/trigger_actions.sql on lines 42–50:
7. Create and configure dbt Cloud project
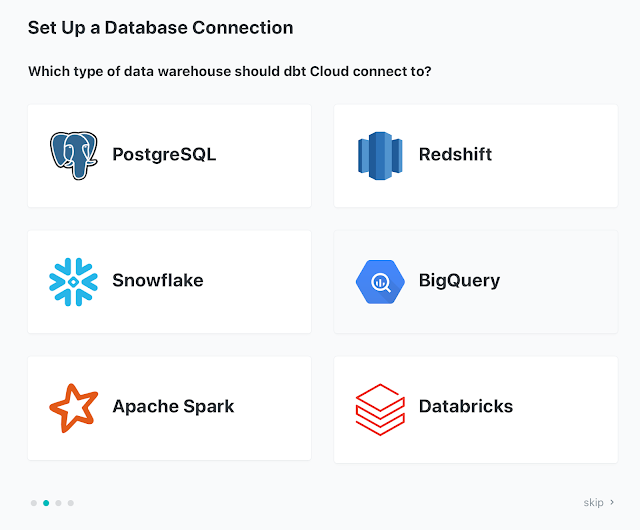
Set up a connection to your new BigQuery database:
You can use your service account JSON key to make setup super easy:
For a fully-blown app or data analytics project, I would recommend setting up your own Github or Gitlab repo. But for the purposes of this little exercise, it would work fine to directly clone the Github I built into a dbt Cloud managed repo.
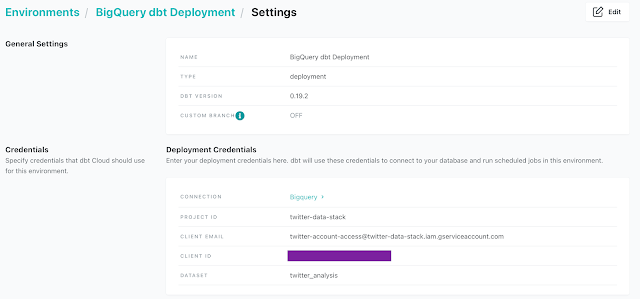
Go to “Environments” in the menu and set up a deployment environment for dbt to work in. This should use the same dataset name you created earlier for analyzed data. (Here we are still using ‘twitter_analysis’.)
Got to Jobs to set up a job to run every morning to process the latest Twitter data.
Be sure to include the call for ‘source freshness’ so that we only run our models if we have fresh data from Twitter. Otherwise we risk creating actions based on missing data. Note that I included the source freshness call as the first command (instead of ticking the “source freshness” box) — this ensures that the entire job fails if sources are not fresh, so we don’t accidentally generate “actions” based on stale data.
I also went ahead and set up an email notification for dbt if a production run fails:
If you run the job right away you’ll see the very simple DAG that this project creates.
- (1) ‘tweets’ — the raw tweet data we’ve collected from Twitter (API reads)
- (2) ‘activity’ — records of individual activity that we’ve triggered based on this app (API writes)
We look to ‘tweets’ to see when a user goes inactive (and thus needs a “u okay?” prompt). We look to ‘activity’ to see when we’ve already prompted inactive users recently, so we hold off on harassing them every day!
 |
| Example of ‘tweets’ table |
| Example of ‘activity’ table |
Most of the rest of the DAG is basic staging, fact, and dimension tables (stg_tweets, stg_activity, fct_tweets, fct_activity, and dim_users). The dim_users table is where we’ve done a bit of math based to understand relative frequencies of user tweeting. This affects our decision for whether to “action” a user and send them a “r u okay?” prompt.
 |
| Example of ‘dim_users’ table |
Finally, we create a ‘trigger_actions’ table, which holds the actions that we want to prompt. That is, these are the users who have gone inactive that we want to send tweets!
 |
| Example of ‘trigger_actions’ table |
Is it overkill to use dbt to materialize this table instead of just hacking a complex query in Python and triggering tweets directly? Yes. But we’re doing it because it’s a nice example of using dbt to break down complex analysis into very simple constituent parts. And this way it’s easier to tweak dbt models via our git repo—and solicit PRs or other input—without needing to rewrite and redeploy our serverless functions.
➔ Additional Features
➔ Takeaways
No matching signature for operator > for argument types
- No auto-increment column structure
- No “default” column value (e.g., set a created_at timestamp)



















No comments:
Post a Comment